Note: We recommend using the shortcuts as much as possible. You can find an overview of keyboard shortcuts and a legend under Help.
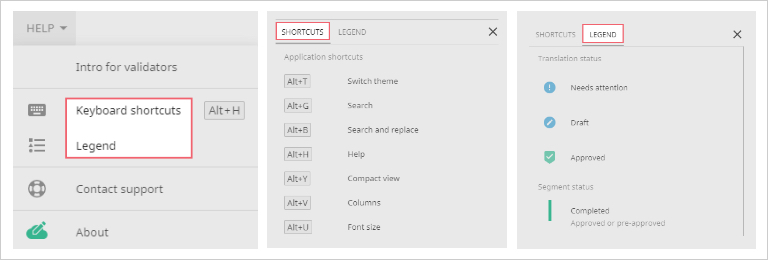
Smart Editor shortcuts under the Help menu
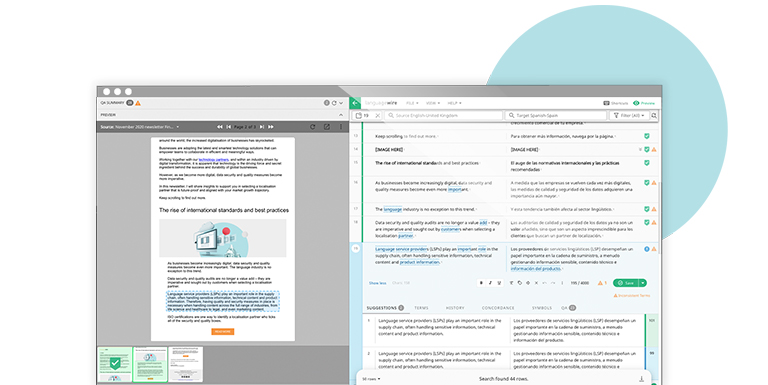
3. Please note that some documents contain tags.
These protect formatting or act as placeholders. You can change how tags appear in the text under "View". Tags are important, so you have to keep them in the text.
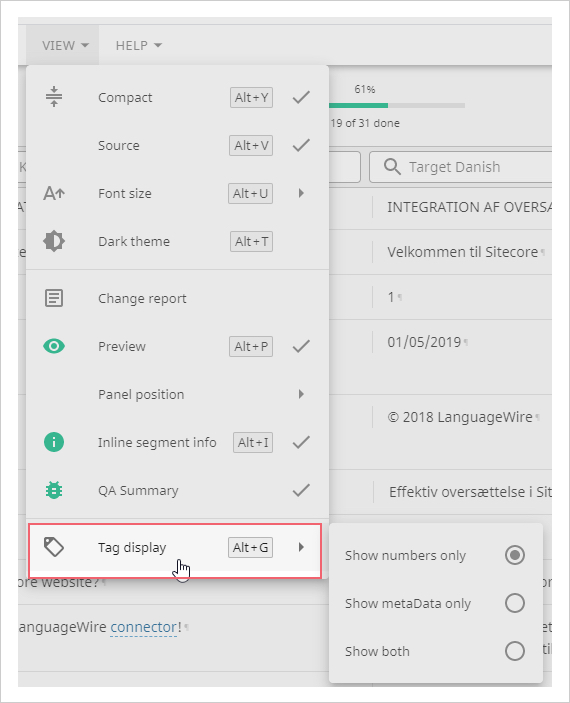
You may also see spaces indicated by the non-breaking spaces symbol. It is important that you keep non-breaking spaces.

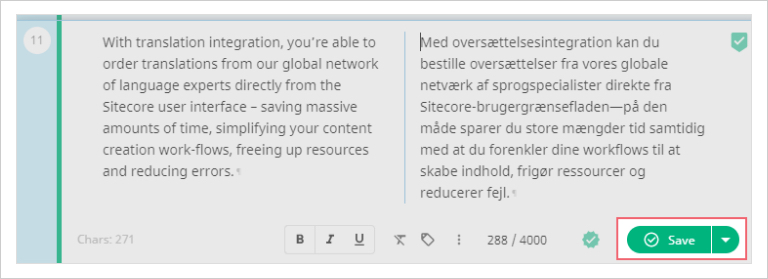
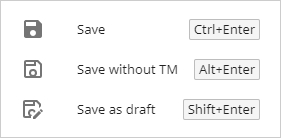
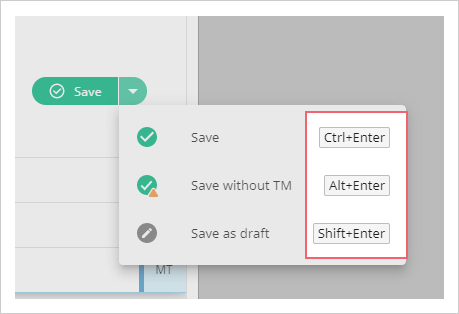
4. Save or Save without TM option.
Smart Editor saves your edits to the document and also for future use by the translator unless you select the "Save without TM" option.
You can also access your company terminology, which is displayed visually for easy adherence.

5. Search if needed.
If you need to search for a word or perform a search and replace action, that's available for you as well.
The search fields are available at the top of the page. To access the replace option, click the icon to the right.

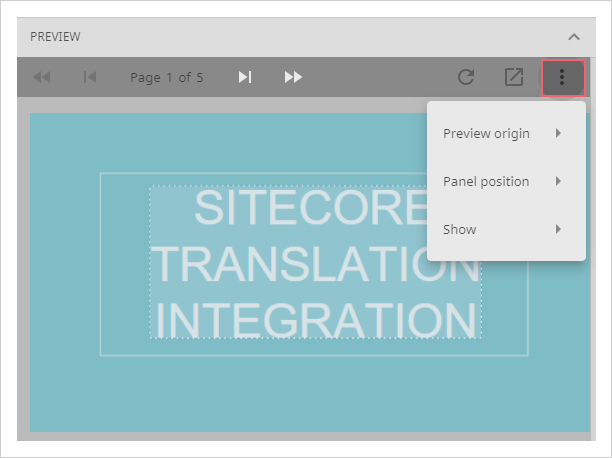
6. Update the preview if needed.
You can update the preview to instantly see your edit for supported formats – just click the refresh button.

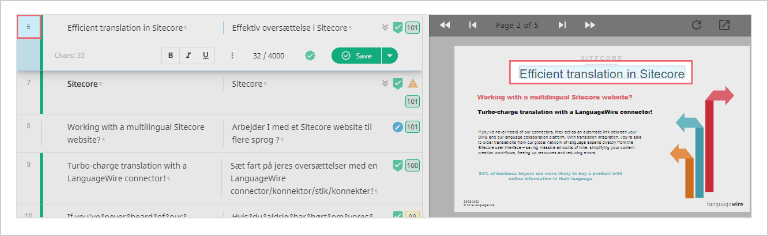
7. Verify your process at the top of the page.
Each time you click save, the segment is ticked and your validation progress goes up a notch – you can verify this at the top of the edit page.

Note: Make sure you go through all segments on all pages to reach 100% completion.
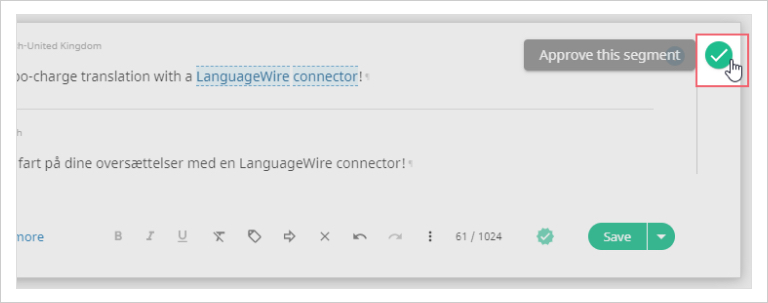
8. Look for the green check mark circle.
Refer to the green check mark circle to spot any segments that still require approval from you.
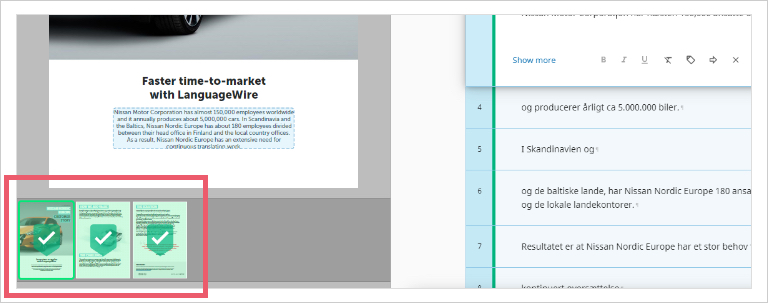
9. Each page that you've approved is shown with a large check mark.
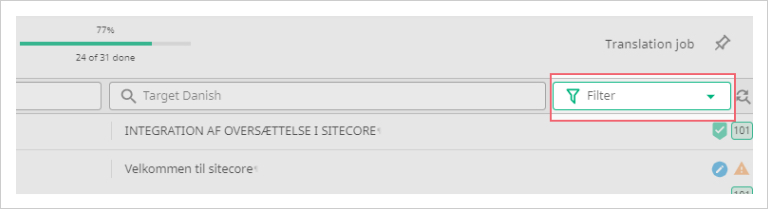
10. Use the filters to display only segments with a specific status.
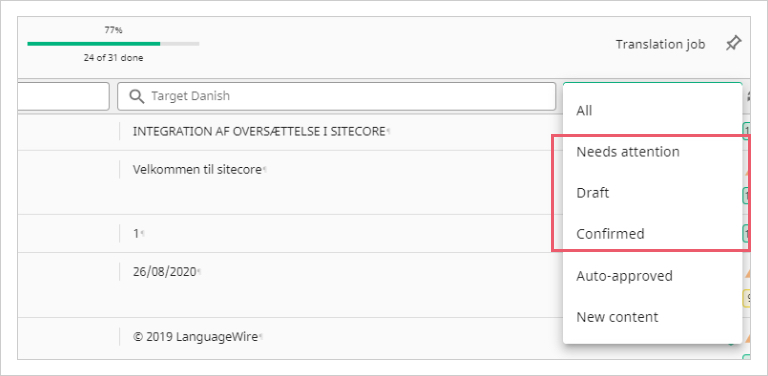
Needs Attention, Draft and Confirmed are all dynamic filters.
Each time you change the status of a segment, the filter will update.
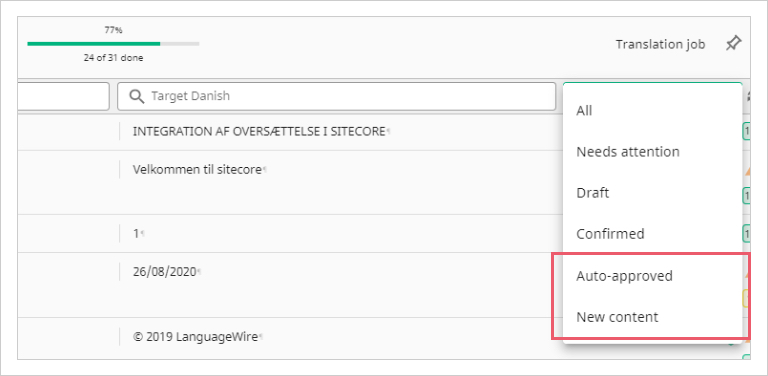
Auto-approved and New content are static filters. They show the status the segments had when the job was started.
If you change the status of a segment in the course of your work, it will still show up with its initial status in these filters.
11. Zoom in on the layout if you need to.
12. Set up the view to how you like it.
You can also change the way the page is displayed, or change the layout origin to either source or target preview.
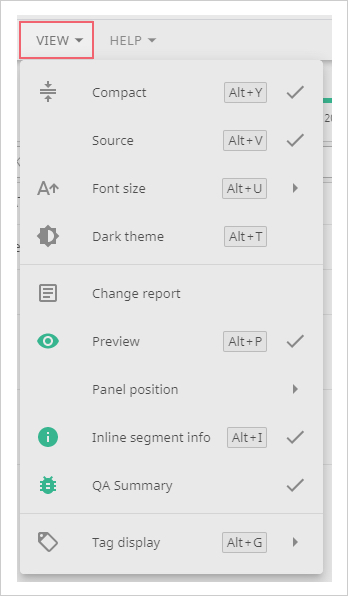
13. Use the built-in QA checker to verify potential issues.

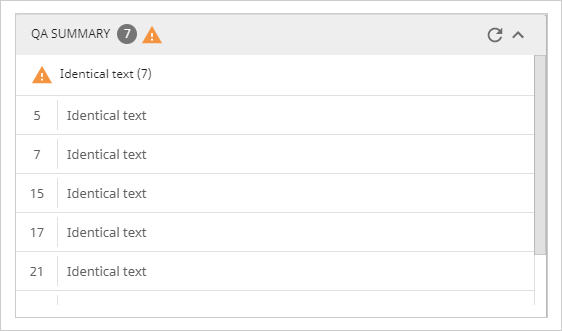
You can also use the QA Summary to locate and correct any issues before your delivery.
14. Once you've resolved an issue, a green OK mark will appear.

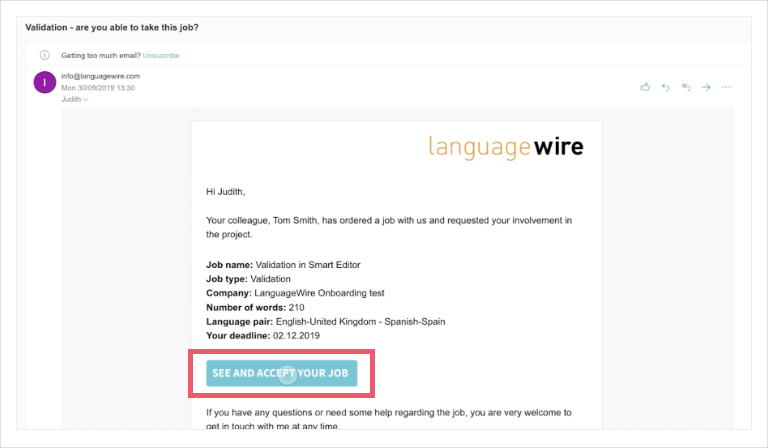
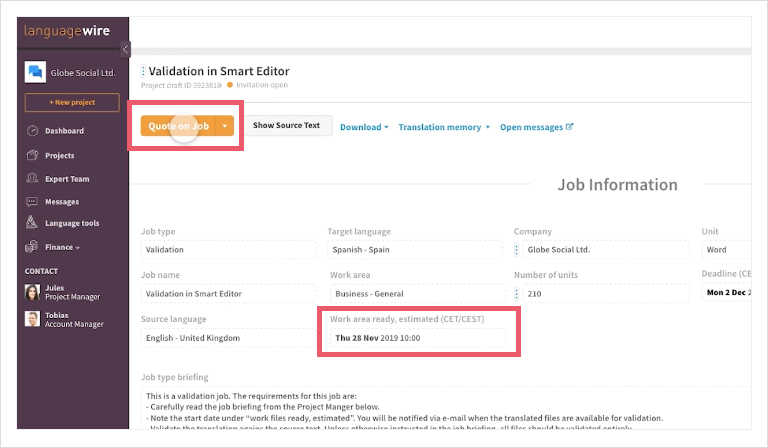
15. Communicate with your team during validation.
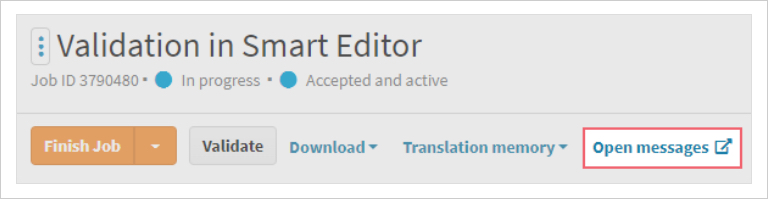
If during the validation you want to communicate with the language expert team or your colleague who ordered the translation, go back to the platform to start a Message.
Simply click the green arrow at the top of the Smart Editor page to go to the job page:

You can come back to your validation in Smart Editor anytime.
Click "Open messages" to write a message.

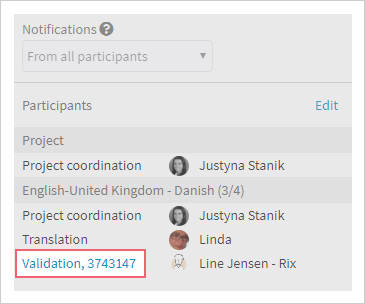
Once you’ve finished your communication in Messages and are ready to go back to Smart Editor, simply click the job from the participants overview.
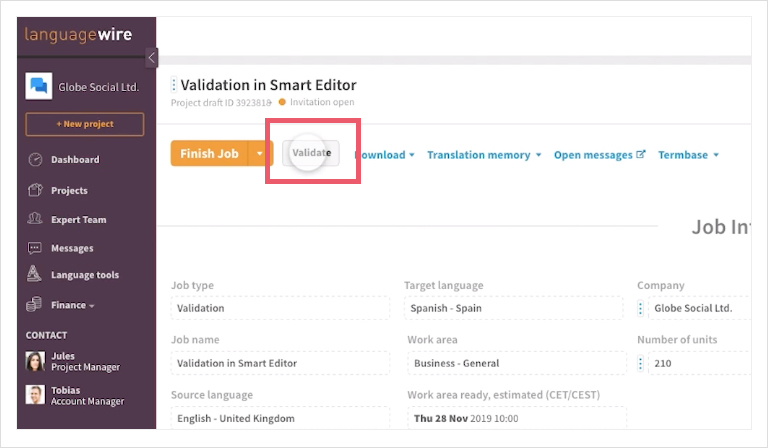
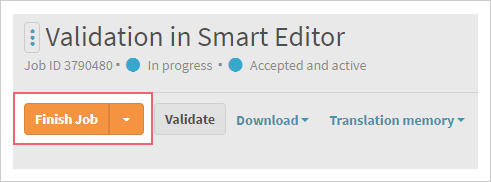
16. Finishing the validation job.
Once you've completed your validation and the progress bar displays 100%, you're ready to finish the validation job. Simply click the green arrow at the top of the Smart Editor page.
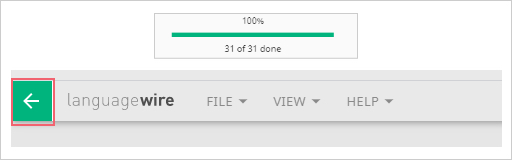
Back on the job page on the LanguageWire Content Platform, simply click "Finish Job".
If you want to leave a delivery note, you can do so at this step.
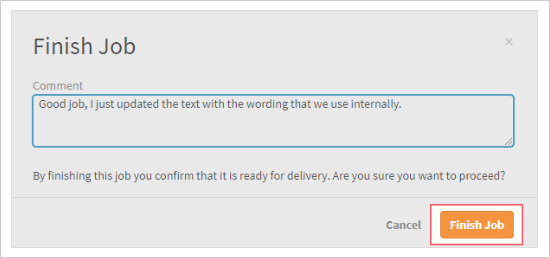
When you click "Finish Job", it automatically signals to LanguageWire that you've completed your validation and that we can proceed to the next step.
Without this confirmation from you, the delivery to your colleagues may be delayed.
If you need to, you can always come back to view the validated text by clicking "Show Translations".
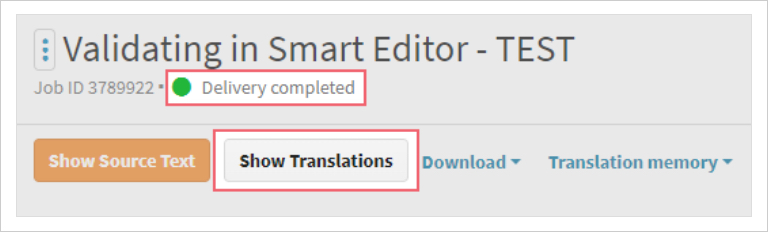
However, once you've finished the job as described, you can no longer edit the text.
Back to top.